Setup guide
Four steps, all in a browser. No software, no command line, about fifteen minutes the first time.
You need a Google account. Anyone you send a viewer link to does not.
- Import the template into a new Google Sheet
- Paste in the code — two files, into the Apps Script editor
- Publish the web app
- Send out the links — one that edits, one that only reads
Then check it works.
1. Import the spreadsheet
- Go to sheets.new.
- File → Import → Upload, drop the
.xlsxin. - Choose Replace spreadsheet, then Import data.
- Name it — Training — Jane, Training — me. One per person.
Import it, do not open it. Double-clicking the file in Drive opens it in Office-compatibility mode, which cannot run Apps Script.
The name becomes the app’s heading and browser tab title, so it is how you tell one person’s log from another. Rename any time; the app follows.
You now have five tabs:
| Tab | What it is |
|---|---|
Log | Empty but for headings. Every set ever logged lands here. |
Exercises | 255 names for autocomplete, each with a how-to video search. Grows as you type new names, which arrive without one. |
Templates | The starting workout for each day type. |
Settings | Which records to track. Fine to ignore. |
Records | Output. Do not type in it. |
Tailoring the template first (optional)
The Templates tab is read only for the very first session of each day type — after that the app works from history.
Each day ships with five exercises, sixteen sets — about an hour with rest. Add or remove rows freely.
Column F, include in new session, decides whether a row is generated. Blank means yes; no keeps it on the plan as a reminder without putting it in the session. Each day has one as a worked example — Cable Chest Fly, Hammer Curl, Standing Calf Raise.
The day column becomes the buttons in the app. Push / Pull / Legs is just what ships; Upper / Lower, A / B, anything works. A Custom button is always offered on top. See day types are yours.
2. Paste in the code
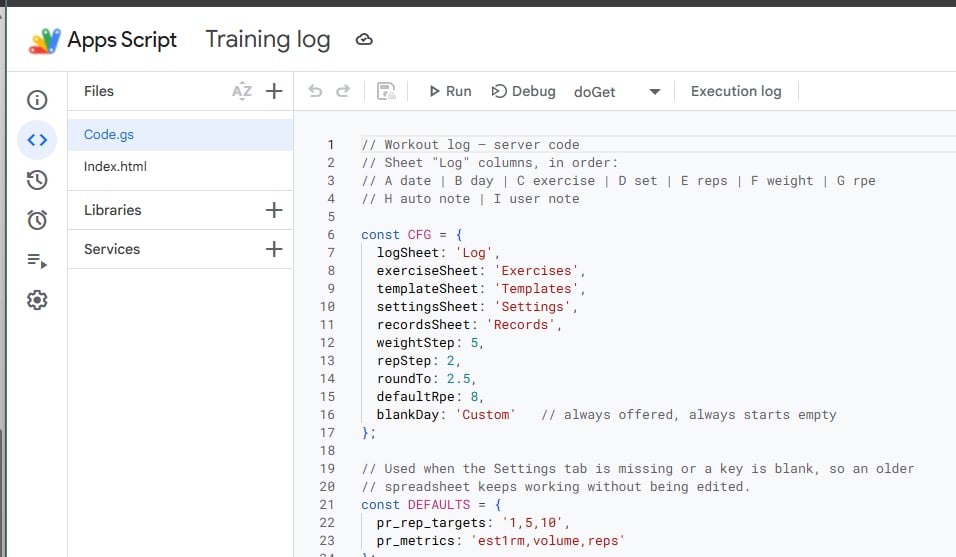
Extensions → Apps Script, and rename the project Training log.
The server file — click Code.gs, select all, delete. Open src/Code.gs, click Raw, copy, paste in.
The interface file — + → HTML, name it exactly Index (no extension). Delete the sample. Open src/Index.html, Raw, copy, paste in.
Replace, do not append. Select everything in Code.gs and delete it before pasting, and do not add a second .gs file — Apps Script joins every .gs file into one scope, so a duplicate stops the whole script with Identifier 'CFG' has already been declared.
Save. It should look like this:
Back in the spreadsheet, reload the page. A Training menu appears:
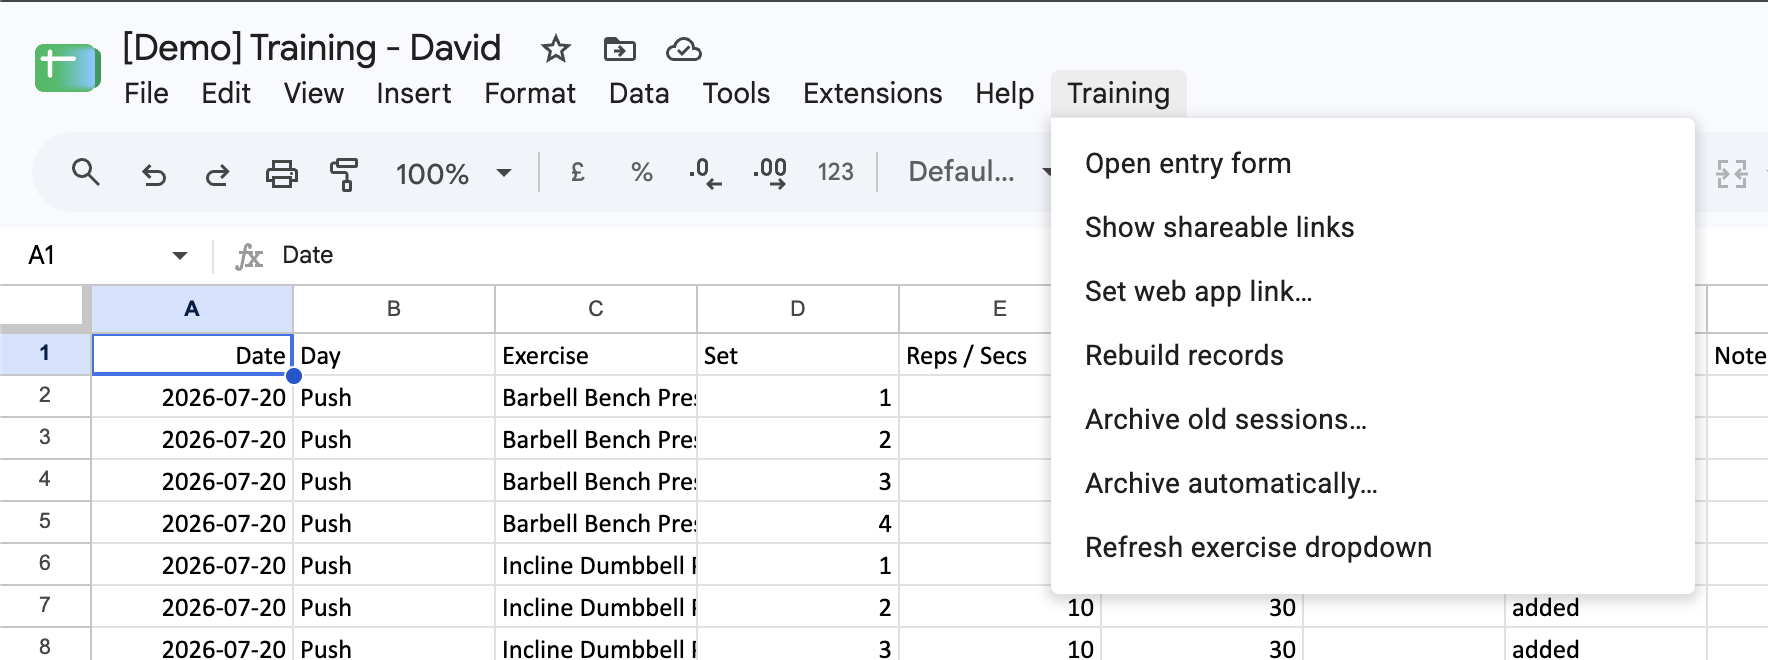
That is how you know the code is attached to the right spreadsheet. Missing? See troubleshooting.
Dates follow your spreadsheet’s time zone — File → Settings → Time zone in the sheet. Worth a glance if you train late in the evening, since that is when a wrong zone would file a session under the previous day.
3. Publish the web app
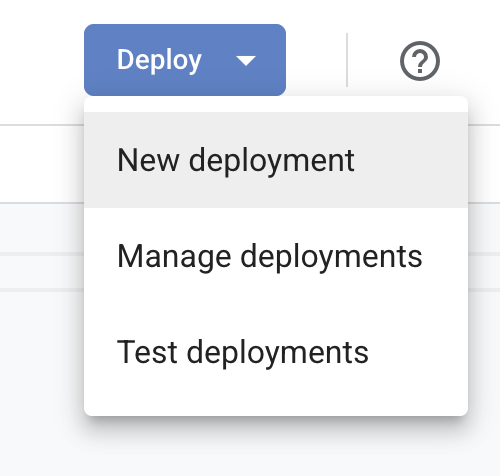
Deploy → New deployment, gear icon → Web app.
| Field | Set to | Why |
|---|---|---|
| Description | Training log | Anything you like — it is how you pick this deployment out later in Manage deployments, which is where you go to publish a new version |
| Execute as | Me | The app edits your sheet on everyone’s behalf, so nobody else needs access to it |
| Who has access | Anyone | Links open without signing in. What they can do is decided by the key in the URL |
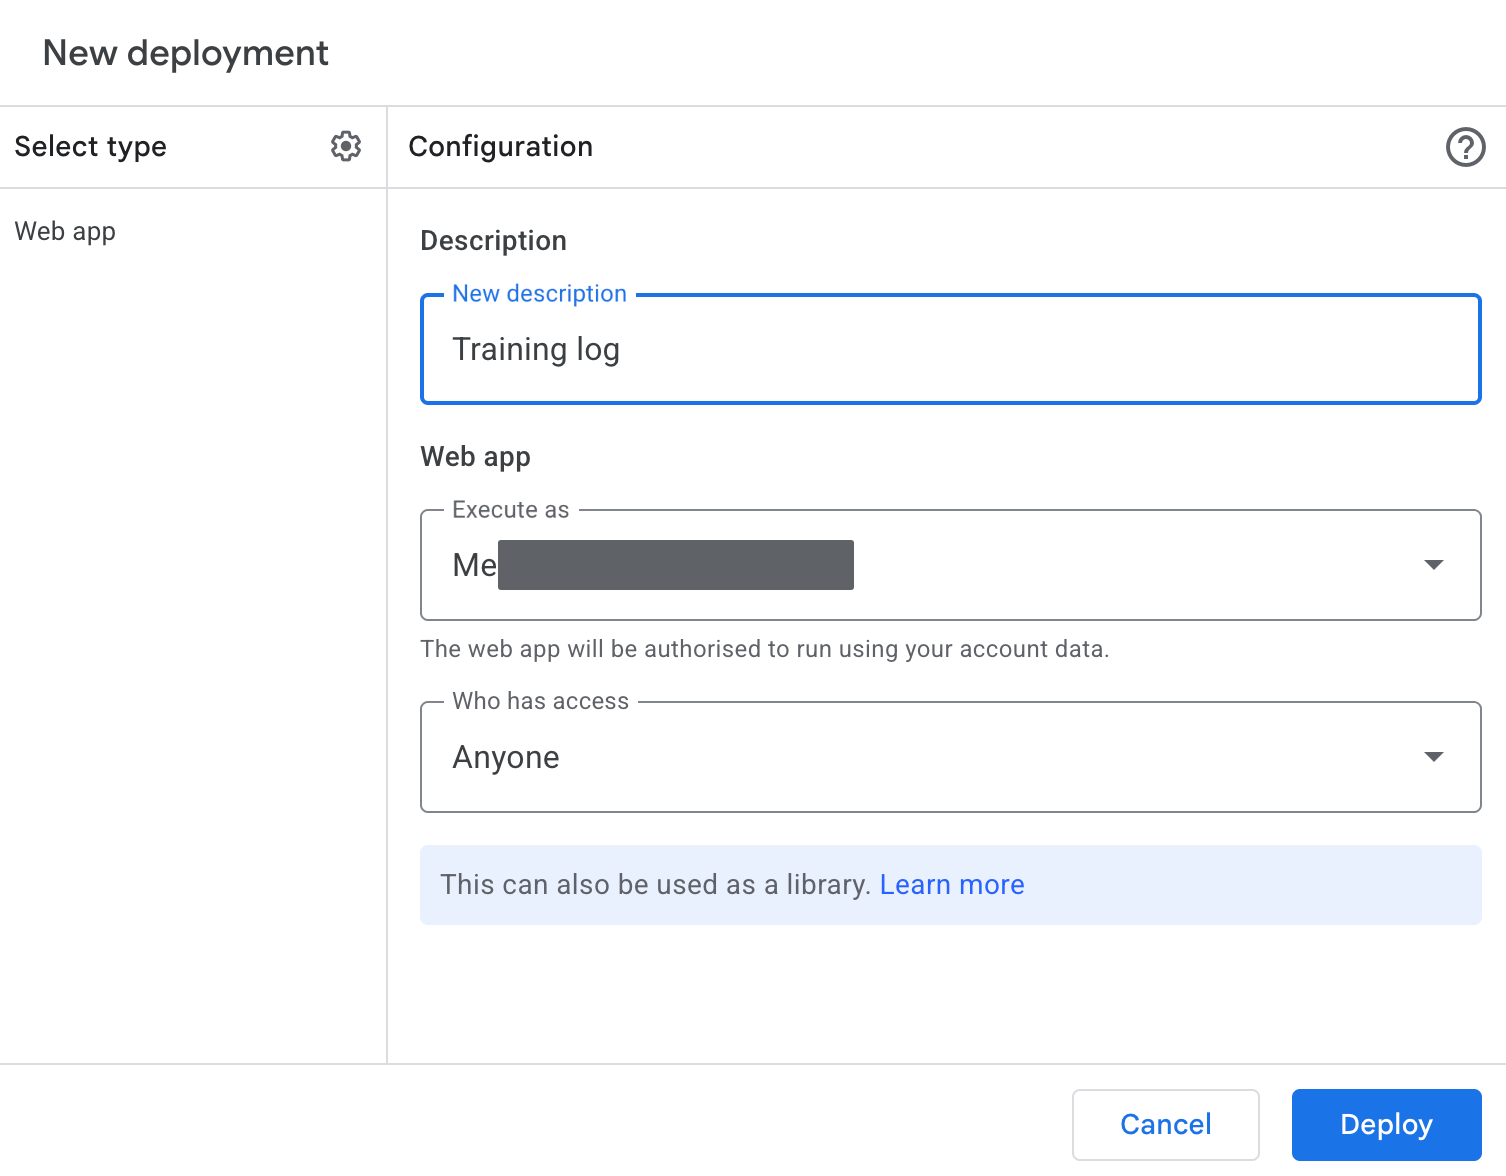
Deploy, then authorize — pick your account, Advanced → Go to Training log (unsafe) → Allow.
"Google hasn't verified this app"
Expected. This is your own script and was never submitted for review. It asks only to read and write the spreadsheet it is attached to, and to show its own web page.
When it finishes, copy the Web app URL ending in /exec. Step 4 needs it.
4. The two links
In the spreadsheet: Training → Show shareable links. The first time it asks you to paste that /exec URL. Paste, OK — it is remembered.
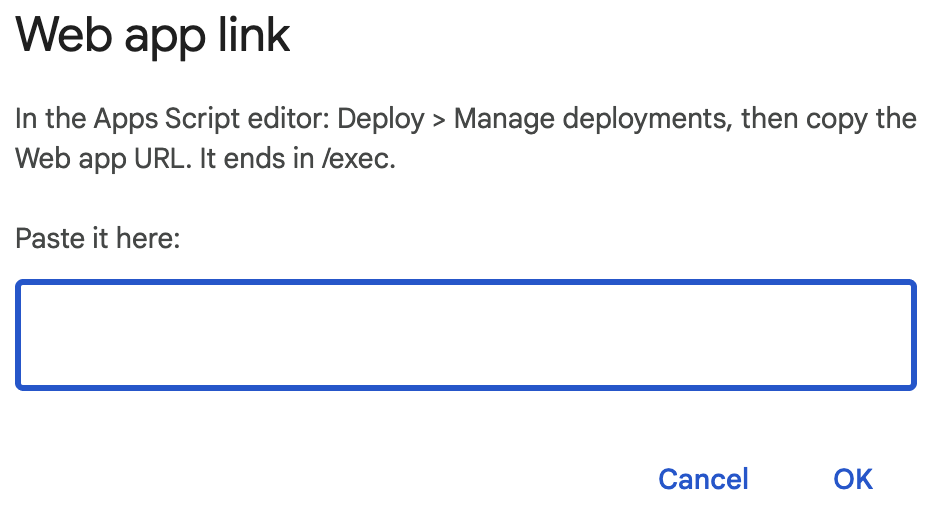
It then shows both links, every time you run it:
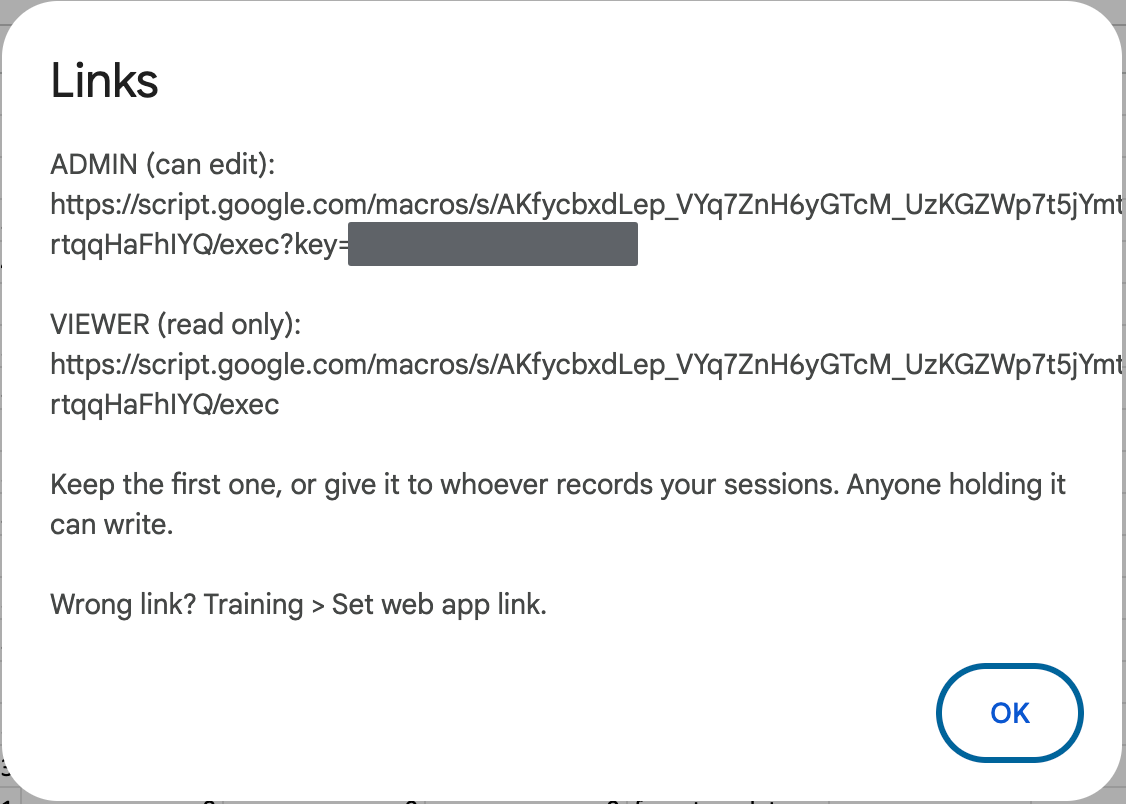
It must be the link ending in /exec. The /dev one is the editor’s test link and only ever works for you. Made a new deployment later? That mints a new URL — run Training → Set web app link.
Admin — …/exec?key=a1b2c3… | Viewer — …/exec | |
|---|---|---|
| Sessions | Starts them | Reads any of them |
| Reps, weight, RPE | Changes them | Reads them |
| Sets and exercises | Adds and removes | — |
| Notes | Writes them | Reads them |
| A whole session | Deletes it | — |
| The report | Builds it, prints it | Builds it, prints it |
Keep the admin link if you log your own training; give it to your trainer if they record your sessions. The viewer link is optional either way.
Treat the admin link like a password — anyone holding it can edit this log, with no sign-in. Send it privately. If it leaks, see rotating the key.
The viewer link is read-only but not secret: it shows the whole training history to anyone who opens it.
On a tablet, open the admin link and use Share → Add to Home Screen. It then behaves like an app icon.
Check it works
- Open the admin link, tap Push, then From the template.
- Tap + on a weight. The bottom bar should read Saved row 2: 8 x 2.5 — the row and the values read back out of the sheet.
- Confirm the number really is in the
Logtab. - Open the viewer link in a private window: same session, no buttons.
- Back on the admin link, Delete this session to clear the test.
Afterwards
Adding another person
Start from step 1 with a fresh import — a clean sheet with no data to delete.
To keep Templates customisations instead: File → Make a copy, then delete every Log row from row 2 down.
Either way the copy needs its own deployment (step 3) and its own link (step 4). Make a copy copies the code but not the deployment.
Each copy is fully independent — own sheet, own deployment, own admin key.
Rotating the admin key
- Extensions → Apps Script → Project Settings.
- Under Script Properties, delete the
EDIT_KEYrow, save. - Training → Show shareable links for the new one.
The old admin link stops editing. The viewer link is unaffected.
Updating to a newer version of the code
- Replace
Code.gsandIndex.htmlas in step 2, save. - Deploy → Manage deployments → pencil → Version: New version → Deploy.
The links stay the same. Skipping step 2 keeps serving the old version.
Do not re-import the template to update. File → Import → Replace spreadsheet replaces the whole spreadsheet, and the template ships a Log containing nothing but headings — so every session you have ever logged is gone. The code lives in Apps Script, not in the spreadsheet, so updating it never requires an import.
To pick up template changes — new exercises, a new column — copy just the tab you want:
- Import the new template into a separate, throwaway spreadsheet.
- Right-click the tab you want → Copy to → Existing spreadsheet, and pick your log.
- In your log, delete the old tab and rename the copy to the original name.
Your Log is never touched. If you have already lost data this way, File → Version history → See version history still has it.
For developers
The browser route above is the supported path. clasp, regenerating the template and the manual test loop are in DEVELOPMENT.md.